




Classic Greenhouse on a Masonry Wall Base
A freestanding greenhouse designed for a customer-built brick, stone, block, or concrete base
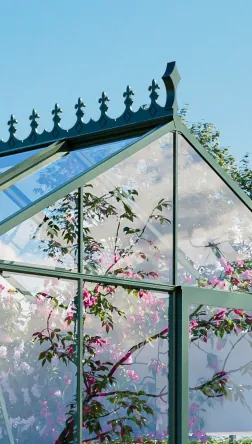
Our Classic Greenhouse on a Masonry Wall Base pairs the symmetrical pitched-roof profile of a traditional greenhouse with a customer-built masonry base. Rather than extending to ground level, the powder-coated aluminum frame sits on a low wall built from brick, stone, block, or finished concrete. This freestanding design allows the lower perimeter to complement the home, garden walls, paving, and other permanent features on the property.
Current U.S. configurations offer several footprint options, with wall height determined by the selected configuration. The masonry base must match the approved project dimensions . Because the greenhouse is manufactured for the selected base arrangement, confirm the footprint, wall height, glazing, doors, and all other configuration details before your contractor lays out the foundation or begins masonry work.
The greenhouse is fully freestanding, so the site must accommodate its complete footprint and provide exterior access on every side. For product availability and ordering assistance, contact Bloomcabin USA.

Freestanding Classic design
The symmetrical pitched-roof design sits above a customer-built masonry base
Enclosed on all four sides, the Classic presents a balanced roofline and finished profile from every viewpoint. Its independent placement allows it to serve as a distinct garden feature rather than an extension of the house.
Because the masonry wraps around the greenhouse, its scale influences how substantial the structure appears in the landscape. Review the base from the main viewpoints around the house, patio, and garden, and decide whether it should stand out or recede. Also consider how the wall will meet nearby paving or planting beds so the greenhouse feels integrated with its setting.
Unlike a greenhouse glazed to ground level, this configuration places a continuous solid wall beneath the aluminum frame. The masonry is therefore a visible interior finish as well as part of the exterior design, so assess its color, jointing, and proportions from both sides.
Decisions that shape daily use
Choose the wall height and detailing around your views, benches, and access
Plan the configuration from the inside out: identify where you will stand, sit, work, and place plants, then select a supported wall height and finish that suit those uses. Decorative masonry details must follow the confirmed greenhouse drawing and preserve the required mounting surface.
Sightlines
At the planned finished-floor level, mark the proposed wall height temporarily and check both seated and standing views before making your selection.
Bench relationship
Use a temporary bench-height marker to check reach, clearance, and the relationship between furniture and the masonry before locating fixed shelves.
Clean mounting edge
Keep caps, projecting joints, and decorative finishes away from the flat surface required to seat and fasten the greenhouse frame.
Exterior circulation
Allow a clear route to the entrance and enough room to reach every side for installation, cleaning, gutter care, and masonry maintenance.
Construction sequence
Finalize the wall height, exact footprint, and doorway before masonry begins
The masonry wall and supporting foundation are customer-built. Work from the confirmed drawing for the exact greenhouse configuration, not a nominal size or an estimate from general product information. The footprint, wall height, corners, and doorway must match the ordered frame. Give the same approved drawing to the greenhouse installer and masonry contractor so both work from one set of dimensions.
Before installation, verify that the wall top is stable, flat, level, square, and accurately sized. Check the overall length and width, compare the diagonals, and inspect every corner. Even a small error at the base can affect frame alignment and complicate installation of the glazing, doors, or roof components. Correcting the masonry is usually simpler before the aluminum structure is in place.
Create one project sheet that identifies the drawing revision, wall material, finished-floor elevation, doorway location, and contractor responsible for each stage. Record any agreed site change in the same place. A clear handoff reduces the risk that separate crews use different dimensions or assumptions.

Product specifications
Classic Greenhouse on a Masonry Wall Base at a glance
Floor area: approximately 41–302 sq ft.
Masonry wall height: approximately 4–20 in depending on configuration.
Main widths: approximately 92.5 in and 122 in.
Glazing: polycarbonate, 0.16 in / 4 mm tempered safety glass, and selected specialty options.
Ventilation: roof windows with manual controls and automatic-opening options on suitable configurations.
Frame: powder-coated aluminum profiles.
Drainage: integrated rainwater gutters.
Doors: sliding doors, depending on configuration.
Warranty: 12-year comprehensive warranty on the aluminum greenhouse structure, subject to the applicable warranty terms. The greenhouse is rated for wind speeds up to 67 mph and a snow load of 43 lb/ft². Proper site preparation, base construction, assembly, and routine care are essential, and property-specific conditions and requirements must also be addressed.

Matching masonry and frame finishes
Coordinate masonry, mortar, and frame finishes
Brick can reference a material already used on the house, garden walls, or paving without matching it exactly. A compatible brick in a different bond or tone can distinguish the greenhouse while maintaining a visual connection to the property. Judge the effect across the full base, including corners and the doorway, rather than from a single brick in isolation.
Mortar color, joint profile, brick size, and laying pattern can influence the finished base almost as much as the brick itself. These details are especially visible on a low wall, where every course affects the greenhouse proportions. If stone or block will receive a finish, include the finished thickness and edge treatment when setting dimensions rather than measuring only the unfinished structural core.
Evaluate the frame color alongside the masonry, interior floor, and nearby exterior materials. A dark or contrasting frame emphasizes the greenhouse outline, while related tones create a more unified composition.
Choosing wall height
Balance views, daylight, and bench placement
A lower masonry wall maintains a stronger visual connection between the plants, greenhouse interior, and surrounding yard. It can work well when views from a chair or low bench matter, or when you want a lighter, more transparent appearance. Judge the view from the planned finished-floor level rather than from unfinished ground.
A taller wall creates a more substantial base and adds more solid area around the lower perimeter. It may suit an interior arranged around benches, raised containers, or work surfaces, but it also changes outward views and the amount of low-level daylight entering from the sides. Compare the available wall-height choices with the planned plants and furnishings before deciding.
Record the chosen wall height consistently in the order documents, masonry plans, and final project drawing. Because it affects the frame connection, doorway arrangement, glazing line, and interior layout, resolve any discrepancy before purchasing masonry materials.
Planning benches and shelves
Plan benches and shelves around the masonry base, glazing, and vents
Sketch the interior from above and from the side, including the solid wall, glazing line, roof slope, doors, and roof windows. Freestanding benches make it easier to reach the perimeter for cleaning and inspection. Fixed shelves need enough clearance from glazing and from any component that opens, drains, or may require service.
The raised glazing line can make the perimeter practical for tall containers and work surfaces placed in front of the masonry. Plan for mature plants rather than seedlings alone, and keep useful glazing clear. If the greenhouse will serve different seasonal purposes, choose furniture and containers that can be rearranged.
Keep the glazing and opening vents accessible for cleaning and inspection. Preserve a practical aisle from the entrance to the far end, and arrange furniture so roof-window operation can be checked without moving fragile plants. Allow enough flexibility to reach greenhouse components as the interior layout changes.
Site-specific foundation
Foundation design varies with soil, frost, drainage, grade, and greenhouse size
The masonry wall needs a foundation suited to the property’s soil, frost conditions, drainage, wall construction, and selected greenhouse size. It should not rest on landscape edging or an unverified surface. A qualified local contractor or design professional should determine the appropriate construction and coordinate it with the interior floor and surrounding grade so water is not trapped beside the base.
Conditions can differ substantially among U.S. properties, even within the same state. Soil movement, frost exposure, slope, groundwater, and previous fill can all affect the foundation approach. Do not copy a detail from an unrelated project simply because the greenhouses look similar above ground. Give the local contractor the confirmed greenhouse dimensions, planned wall material, site levels, and intended floor construction.
Before excavation, have buried utilities located and share the results with the foundation contractor. Review the routes for any planned water, power, or drainage lines at the same time so new work does not conflict with existing services. Mark agreed routes on the site plan and retain that information with the project records.
Planning the entrance
Coordinate the doorway, threshold, floor, and exterior approach
Treat the door opening, wall height, finished interior floor, threshold, and exterior approach as one coordinated detail. Establish a clear reference level for every adjacent surface. If pavers, stone, gravel, or another finish will be added later, include its completed thickness from the start so the entrance works with the final floor rather than the unfinished excavation.
Even an accurately built wall can create daily inconvenience if access is overlooked. Consider everything that will pass through the sliding doors, including carts, bags of growing medium, watering tools, and mature plants. The exterior path should meet the entrance cleanly, and the interior should leave room for the doors to operate. Drainage should not direct water across the entry or create an unstable surface.
Confirm the exact door configuration and opening location before finalizing the masonry. Mark the entrance on the site plan and check its relationship to paths, gates, steps, utility points, and the greenhouse aisle. A doorway shown correctly on the product drawing may still be inconvenient if a fence or planting bed restricts the approach. Review the complete route from the yard into the greenhouse.
Managing roof runoff
Gutters and rainwater
Integrated gutters collect water from the pitched roof so runoff can be directed to a planned location. Decide where each outlet will discharge before landscaping around the greenhouse. Keep the route accessible for inspection, and do not end it where water could erode soil near the foundation, saturate a path, repeatedly splash the masonry, or flow toward neighboring property.
After installation, inspect the discharge during rainfall and look for splashing, ponding, soil movement, or flow back toward the wall. Adjust the grading or outlet route if needed, and keep it free of leaves and debris. Check it again after landscaping changes, because displaced soil or mulch can alter the original drainage path.
Where practical and permitted, collected roof water can be stored for irrigation. Plan the container location, overflow route, stable support, and convenient access without blocking exterior maintenance. The container should not rely on the greenhouse frame or an improvised attachment for support. Its overflow must continue to direct excess water appropriately when storage is full.
Ventilation planning
Using roof windows to release heat
Warm air collects near the pitched roof, where roof windows provide an outlet. Keep aisles and spaces around plants open enough for air to move, and adjust the openings according to greenhouse conditions and plant needs. Plan who will monitor the greenhouse during bright weather or absences, and make sure nearby branches or structures do not obstruct the windows or their operation.
Manual vents suit owners who can inspect the greenhouse regularly and adjust the openings as conditions change. Check the weather, interior temperature, door position, and plant response rather than following a fixed calendar. A greenhouse can heat up quickly during bright periods outside the main summer season. Keep the operating hardware clean and unobstructed, and close the openings when conditions require it.
Automatic-opening options on suitable configurations can respond when you are away and reduce the need for perfectly timed adjustments. They do not replace regular observation, adequate airflow, or seasonal changes. Inspect the mechanisms periodically, keep their movement clear, and make sure plants have not grown into the opening path. Choose the ventilation arrangement while configuring the greenhouse.
Choosing glazing
Glass, polycarbonate, and specialty options
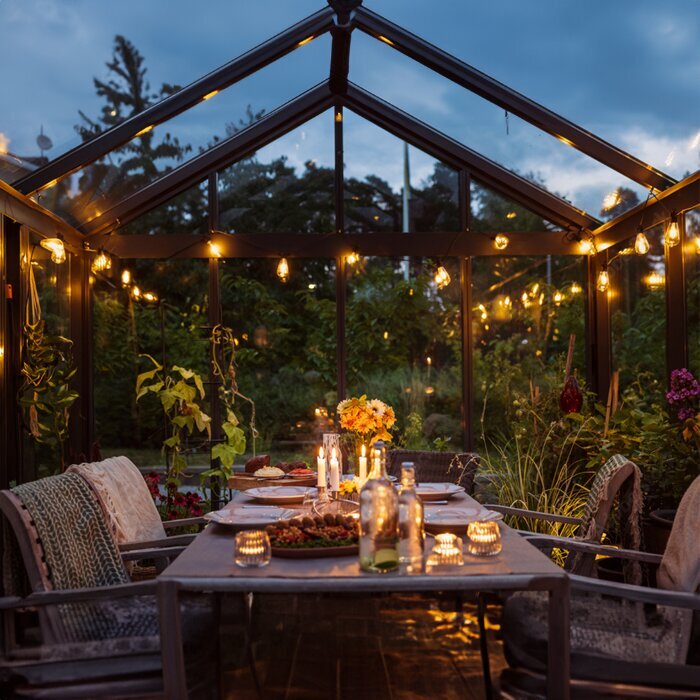
Tempered safety glass provides the clear appearance associated with a traditional greenhouse and keeps views through the structure open. That transparency can be important when the greenhouse is a visible feature in the yard. It also leaves benches, irrigation lines, and storage in full view, so plan the interior with its appearance from outside in mind.
Polycarbonate offers a different balance of light transmission, insulation performance, weight, and impact resistance. It is less transparent than clear glass and can soften the view of plants and equipment from outside. The preferred choice therefore depends on the crops, desired visibility, everyday use, and how the greenhouse should look above the masonry base. Compare only the glazing options supported for the selected configuration.
Specialty glazing can support particular growing or design goals, but availability depends on the greenhouse configuration. Ask how each supported option affects appearance and daily use before ordering. Do not assume that panel details from another model are compatible with this Classic greenhouse’s doors, vents, or masonry line.
Planning the finished floor
Choose the surface and set its final elevation early
Pavers, stone, gravel, or another durable surface can complement the masonry and support different uses. A firm, easy-to-clean floor is convenient for benches and carts, while a free-draining surface may suit a more plant-focused layout. Consider stability, drainage, upkeep, and comfort underfoot. Loose material near sliding-door tracks or moving components may need edge restraints and extra maintenance.
Determine the finished-floor elevation before building the doorway and wall. Include the full depth of the base layers and surface material, not just the visible finish. The level should support convenient access, preserve drainage, and leave required clearance around greenhouse components. Give the same elevation information to the foundation contractor, mason, floor installer, and greenhouse installer.
Plan for irrigation, condensation, and cleaning water to leave the interior without collecting against the masonry. The right solution depends on the floor and site, but water should not remain in low spots or be directed beneath an unsuitable foundation. Keep drainage routes accessible after benches and containers are installed, and remove soil or plant debris that could block flow.
Planning utilities
Water, power, drainage, and future equipment
Water, electrical service, and dedicated drainage are easier to integrate before the wall and floor are completed. Begin with an equipment plan rather than placing outlets or pipes in arbitrary corners. Consider where watering will happen, where hoses will be stored, which routes stay clear of the doors, and what remains accessible behind benches. Electrical work should be designed and completed by an appropriately qualified professional under applicable local requirements.
If future heating is under consideration, reserve space and seek project-specific guidance before routing services or making penetrations. Equipment placement affects plant clearance, circulation, and access. Do not alter greenhouse components later to accommodate an unplanned pipe, cable, vent, chimney, or other specialized installation; obtain appropriate technical advice and confirm local requirements first.
Early coordination keeps service routes orderly and reduces the need to add pipes or cables across finished masonry. Photograph concealed work before it is covered and retain a simple plan of pipe and cable locations. This record is useful when adding shelves, changing landscaping, or making future repairs. Keep shutoffs and service points accessible without dismantling the greenhouse interior.
Arranging crops along the perimeter
Plant height, reach, and airflow
Leave clearance between containers or benches and the masonry so spills can be cleaned, joints can be inspected, and items do not become trapped behind furniture. Do not transfer heavy shelf loads to the glazing or aluminum frame unless a specific accessory and installation method are designed for that use.
Taller crops can use the glazing and roof space above the raised wall, especially when containers are placed near the sides. Check mature plant height against the sloping roof and roof-window movement, not just the eaves. Keep frequently handled plants within easy reach and reserve the central height for crops or supports that genuinely need it.
Arrange plants so air can move through and around the foliage. Stagnant areas can develop behind tightly packed benches or where leaves press against the perimeter. Containers should be easy to rotate, inspect, and remove without disturbing the glazing. Reassess spacing as plants mature and when overwintered specimens are moved inside.
Freestanding or attached?
How the Classic differs from a Lean-To
A Lean-To shares a wall with an existing building and generally has a single-slope roof.
The Classic is enclosed on all sides beneath a symmetrical pitched roof.
Choose the Classic when you want a separate greenhouse; consider a Lean-To when attachment to a suitable building is central to the plan.
Checking local requirements
Approvals, setbacks, and property restrictions
Requirements vary by state, county, municipality, and property, and additional development rules may apply. The greenhouse footprint, permanent masonry, utilities, placement, and intended use may all be relevant. Contact the appropriate local authorities and review applicable property documents before committing to construction. Calling the structure a “greenhouse” does not by itself determine which rules apply.
Verify setbacks from property lines and buildings, easements, height or lot-coverage rules, and any required construction approvals before excavation or site work is ordered. If a homeowners association or similar organization applies, review its process as well. Keep written approvals and the confirmed site plan with the project records.
Do not assume that another greenhouse in the neighborhood proves this project is allowed. Its size, foundation, construction date, property rules, or approvals may differ. Describe this product accurately as a complete freestanding greenhouse on a customer-built masonry wall base so it is not confused with an attached Lean-To, a seasonal cover, or a landscape wall.
Keeping service areas clear
Access for cleaning and maintenance
Leave practical clearance outside the greenhouse for washing the glazing, clearing gutters, inspecting the frame, and maintaining masonry joints. Make sure the area can be reached with the tools normally used for those jobs. A narrow gap beside a fence or dense hedge may look acceptable on a plan but make routine upkeep difficult. Review every side of the footprint, including roof edges and drainage outlets.
Shrubs planted directly against the base can hold moisture, drop leaves into gutters, scratch glazing, and obstruct repairs as they mature. Choose plants according to their full-grown size rather than their nursery size. Keep roots, irrigation emitters, and mulch from creating drainage or maintenance problems beside the wall. Movable containers can provide seasonal planting where permanent growth would restrict access.
Use surrounding planting to frame rather than crowd the greenhouse. Preserve useful views from the house and garden while keeping doors and vents unobstructed. Set delicate beds away from the routes used by carts, ladders, and cleaning equipment so regular greenhouse care does not damage the landscape.
Planning for long-term ownership
Review permanent decisions before construction
The masonry base is difficult to alter after installation, so review the footprint, material, wall height, doorway, floor level, and utility routes together. Mark the proposed outline on the ground and walk the approach, entrance, aisle, and exterior service route. This simple site check can reveal a tight gate, inconvenient turn, or poorly placed outlet that is not obvious on a drawing.
Choose wall and frame colors that will continue to suit the property rather than follow a short-lived decorative trend. Consider how the masonry material, mortar, and exposed edges will weather, and select finishes that can be cleaned and repaired without disrupting the overall appearance. Plan how future joint or surface repairs can be reached around benches and exterior planting.
Pay particular attention to the junctions between masonry and frame, floor and threshold, and gutters and site drainage. These transition points affect both the finished appearance and everyday use. Review them together on the drawings and at the site so one trade’s work does not obstruct another component or leave an awkward gap.
Installation handoff
Prepare the completed base and site before greenhouse installation
Before greenhouse components arrive, clear the doorway, wall perimeter, delivery route, and a suitable staging area. Keep loose landscape materials away from sliding-door tracks and frame connection points, and protect completed paving or masonry from avoidable damage. Make sure the approved drawing and current site contact information are available to the installer.
At handoff, tell the installer about concealed utilities, drainage routes, and any site changes made after the original layout. Resolve changes that affect the doorway, finished floor, wall top, or access before assembly begins. The greenhouse frame should not be forced or modified to compensate for an unresolved base condition.
During installation, follow the supplied instructions and use tradespeople with the appropriate skills for their assigned work. Keep unrelated activity away while glass, aluminum parts, masonry materials, and tools are being handled. After completion, check the doors, roof windows, gutters, drainage routes, and visible frame connections, then retain clear access for future inspection and care.
Practical questions
Classic Greenhouse on a Masonry Wall Base: FAQ
Can the frame compensate for an out-of-square wall?
No. The finished masonry must match the confirmed footprint and provide a level, square, accurately sized mounting surface. Correct the base before installation rather than trying to force the manufactured frame to fit.
Should masonry caps project beneath the aluminum frame?
No projection should interfere with the frame’s mounting line. Coordinate caps, finished stone, mortar joints, and other decorative details so the required wall-top surface remains flat, clear, and accurately dimensioned.
When should the finished-floor height be set?
Set it before the wall and doorway are built. Include all base layers and the final surface so the threshold, interior floor, exterior approach, and sliding doors work together at their completed elevations.
Can benches or shelves be attached to the glazing or frame?
Not unless the specific accessory and installation method are designed for that purpose. Freestanding benches are often easier to position without loading the glazing, obstructing vents, or limiting access for cleaning and inspection.
Where should the gutter outlets discharge?
Direct them to a planned location where runoff will not erode soil beside the foundation, saturate the entrance path, repeatedly splash the masonry, or flow back toward the greenhouse. Keep the discharge route accessible for inspection and cleaning.
Do automatic roof-window openers replace regular checks?
No. They can respond when you are away, but the greenhouse still needs regular observation, clear airflow, seasonal adjustment, and periodic inspection of the opening mechanisms.
What project records should I keep?
Keep the order documents, approved dimensions, warranty terms, contractor information, site plan, and photographs of the completed base and concealed utility work. These records make future maintenance and troubleshooting easier.
How should I compare masonry and frame colors?
View representative samples outdoors at the greenhouse site. Compare the frame color with the brick or stone, mortar, nearby paving, and planned interior floor under changing daylight before making the final selection.
Plan your Bloomcabin Classic
Bring the greenhouse, masonry, access, and drainage plans together
When you are ready to configure the greenhouse, share the planned site and masonry concept with Bloomcabin USA. Confirm the selected product options and project dimensions before your contractor prices or schedules the wall and foundation.
Information to have ready
✓ Preferred footprint and proposed location
✓ Desired wall material, finish, and height
✓ Finished-floor and exterior path levels at the doorway
✓ Planned gutter discharge and utility routes
✓ Foundation and masonry contractor information
✓ Applicable approvals, setbacks, and property restrictions